How to Find and Replace the Eccentric Bushing in a DJ-15 Delta Jointer
Understanding the DJ-15 Delta Jointer and Its Challenges
The DJ-15 Delta Jointer is a beloved tool among woodworkers and DIY enthusiasts. Even though it’s old, the DJ-15 is still loved for being strong and reliable. This jointer has helped countless makers craft everything from furniture to fine art. However, as time marches on, maintaining this classic piece of equipment has become more challenging because Delta no longer makes replacement parts for the jointer.
One of the main hurdles faced by those who own a DJ-15 is finding replacement parts, especially when it comes to the eccentric bushing. This small but crucial component plays a key role in the jointer’s operation by allowing precise adjustments of the infeed table. Over time, parts like the eccentric bushing can wear out or get damaged, such as when a part chipped off the flange, leading to operational issues. Unfortunately, with Delta stopping the production of these parts, owners are now left in a bind, needing to find eccentric bushing replacements to keep their machines running smoothly.
For those set on restoring an old DJ-15 Delta Jointer, the lack of readily available parts means turning to DIY solutions or seeking help from the community. Enthusiasts often band together on forums and specialty sites, sharing tips and resources for maintaining these treasured machines. Whether you’re looking to help either make one or know a site that may sell an eccentric bushing, being part of this community can offer a wealth of knowledge and support. Embracing these challenges allows makers not only to keep their equipment in top shape but also to hone their problem-solving skills and connect with fellow hobbyists.
Identifying the Eccentric Bushing Issue
To keep your DJ-15 Delta Jointer running smoothly, it’s important to understand the role of the eccentric bushing and how it can affect your machine. The eccentric bushing is a small, yet crucial part that helps adjust the infeed table of the jointer. When everything is working properly, this allows for precise and even cuts. However, issues can arise, especially if the eccentric bushing has a part chipped off the flange.
You might notice something is wrong if your jointer isn’t cutting as smoothly as it used to. Common symptoms include uneven cuts or difficulty in adjusting the infeed table. These issues often point to a problem with the eccentric bushing. To find the problem, look at the bushing closely. Look for visible damage like cracks or chips, especially on the flange, as these can hinder the bushing’s ability to function correctly.
If you suspect the eccentric bushing is the culprit, it’s time to take a closer look. Carefully disassemble the jointer to access the bushing. Look for any signs of wear and tear, and check if any parts are loose or damaged. Remember, Delta no longer makes replacement parts for the jointer, so identifying the problem correctly is the first step to finding a solution. Whether you need to help either make one or know a site that may sell an eccentric bushing, understanding the exact nature of the issue will guide you in restoring your beloved tool.
Restoring Your Old DJ-15 Delta Jointer
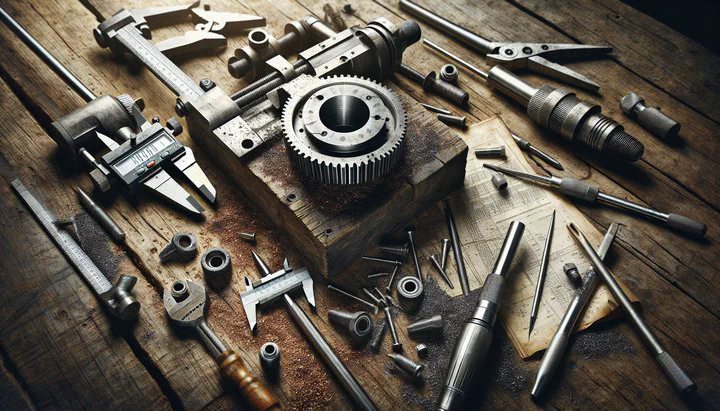
Restoring an old DJ-15 Delta Jointer can feel like bringing a classic car back to life. It’s a rewarding project that requires both patience and a bit of elbow grease. To start, you need to disassemble your jointer to get a good look at the eccentric bushing and other internal parts. Begin by unplugging the machine for safety, then carefully remove the infeed table. This will give you access to the components you need to inspect and clean. Check out diagrams or video guides online for visual help with taking apart the jointer.
While you have your jointer in pieces, take the opportunity to clean out any dust or debris that’s accumulated over the years. Use a soft brush or vacuum to clear out the hard-to-reach areas. This not only helps in diagnosing the issue with the eccentric bushing but also ensures that your machine runs smoothly once it’s back together. Remember, a clean machine is a happy machine!
Now, focus on the eccentric bushing itself. If you discovered that the eccentric bushing has a part chipped off the flange, you’ll need to decide whether to repair or replace it. Since Delta no longer makes replacement parts for the jointer, you might need to get creative. Some makers opt to craft a new bushing using materials like brass or steel, while others turn to the community for help. There are forums and websites where fellow enthusiasts share tips on how to fabricate parts or suggest places where you can buy replacements.
As you work on restoring an old DJ-15 Delta Jointer, keep a keen eye out for any other parts that may need attention. Lubricate moving parts, tighten any loose screws, and ensure that everything is in good working order. This is also a good time to sharpen or replace the jointer knives, ensuring that your cuts remain clean and precise. By addressing these issues now, you’ll extend the life of your jointer and improve its performance.
By the end of your restoration project, you’ll have not only a fully functioning jointer but also the satisfaction of having done it yourself. Whether you decide to help either make one or know a site that may sell an eccentric bushing, the journey of restoring this classic tool will undoubtedly enhance your skills and deepen your appreciation for the craft.
Making or Finding a Replacement Eccentric Bushing
When it comes to finding an eccentric bushing replacement for your DJ-15 Delta Jointer, you have two main paths: making your own or sourcing one from other makers. Since Delta no longer makes replacement parts for the jointer, these options allow you to bring your beloved machine back to life.
Creating Your Own Eccentric Bushing
If you’re up for the challenge, making your own eccentric bushing can be a rewarding DIY project. First, gather the necessary materials such as brass or steel, which are durable enough to withstand the jointer’s operations. You’ll also need some basic tools, like a metal lathe, to shape the bushing to the correct dimensions. This is a great opportunity to hone your machining skills and ensure the part fits perfectly.
Start by measuring the old bushing if possible, paying close attention to the dimensions, especially where a part chipped off the flange. Use these measurements to machine your new bushing. Take your time and double-check your work to make sure everything lines up correctly. Once finished, you’ll have a custom part that fits your machine like a glove.
Finding a Replacement
If making a new bushing feels too hard, that’s okay. You have other options. Start by checking online forums and community sites dedicated to tool restoration and woodworking. These platforms often have members who either make custom parts or can direct you to small businesses that specialize in machine components. Connecting with others who are also restoring an old DJ-15 Delta Jointer can lead you to resources and suppliers that aren’t widely advertised.
You might also find success by visiting local machine shops. Some shops offer custom fabrication services and might be able to help either make one or know a site that may sell an eccentric bushing. Bringing the old part with you can help them understand exactly what’s needed.
By either making or sourcing a new eccentric bushing, you’ll be one step closer to getting your jointer back in action. These efforts not only solve an immediate problem but also connect you with a community of makers and restorers who share your passion for preserving classic tools.
Reassembling and Testing Your Jointer
Once you’ve found or made your eccentric bushing replacement, it’s time to reassemble your DJ-15 Delta Jointer. This step is crucial to ensure everything is aligned correctly and works as it should. Start by carefully placing the new or repaired bushing into its position. Make sure it fits snugly and all parts are properly seated.
Begin reattaching the infeed table, ensuring the eccentric bushing adjusts smoothly. Tighten the screws and bolts securely, but be careful not to overtighten them, as this could damage the new parts. As you put each piece back in place, double-check that everything aligns perfectly and that there are no leftover parts or loose connections.
After reassembly, it’s time to test your jointer. Plug it back in and start it up. Listen for any unusual noises that might indicate a problem. If everything sounds good, try a test cut. Place a piece of wood on the infeed table and slowly feed it through the machine. Check for smoothness and consistency in the cut. If the jointer is still making uneven cuts, revisit your assembly steps to ensure nothing was missed.
Testing Checklist:
- Ensure all screws and bolts are tight.
- Check that the table adjusts smoothly.
- Listen for strange noises when the machine is on.
- Try a test cut and check for smoothness.
If any issues persist, consider seeking advice from community forums or guides on restoring an old DJ-15 Delta Jointer. Sometimes, a small adjustment can make a big difference.
Finally, keep an eye on the jointer over time. Regular maintenance and checks will help keep it in top shape. With your new skills and knowledge, you’re now part of a community dedicated to preserving and enjoying these classic machines. Whether you had to help either make one or know a site that may sell an eccentric bushing, your efforts ensure your jointer will continue to serve you well for years to come.
Share your restoration stories or ask for advice in the comments below! Let’s help each other keep these machines running.