How to Mount a Board onto a Toolhead and Connect it Properly
Introduction to Mounting Boards onto Toolheads
In the world of 3D printing and CNC machining, toolheads play a vital role. They hold and move tools or materials to create your desired object. To make sure these toolheads work their best, you need to mount boards onto toolheads and connect them properly. This might sound tricky, but doing it right is key to getting your machines to run smoothly and efficiently.
When you mount a board onto a toolhead, you are setting up the brain of the machine. The board controls how the toolhead moves and operates. If the board isn’t mounted well, you might face problems like poor performance or damage. But don’t worry, we’re here to help you through it step by step!
In this article, we’ll guide you through the steps needed to mount a board onto a toolhead and connect it properly. Whether you’re a beginner or a seasoned pro, these steps will help your machine run perfectly.
Step-by-Step Guide to Mounting and Connecting the Board
Before you begin, gather all the necessary tools and parts. You’ll need:
- A screwdriver set
- Mounting brackets
- Screws
- The board itself
Having the right tools at hand makes the process faster and ensures you don’t have to stop midway to search for something.
Step 1: Prepare the Toolhead
- Check the toolhead to ensure it’s clean.
- Place it in a stable position where you can easily access it.
- Pro Tip: Disconnect the whole toolhead if needed, to make your work easier and avoid any accidental damage.
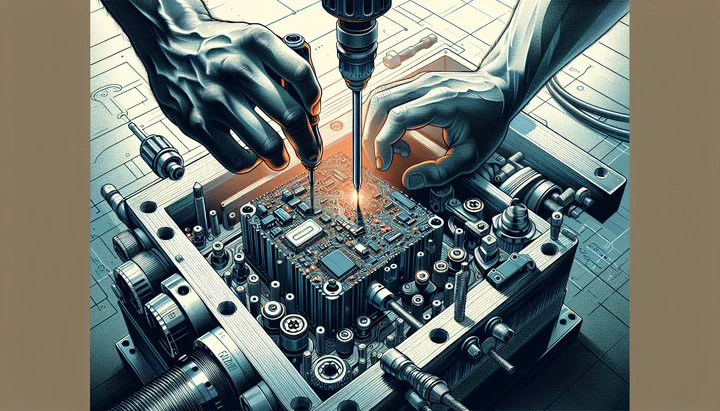
Step 2: Secure the Board
- Align the board with the mounting holes.
- Use screws and brackets to secure it.
- Tip: Be cautious not to overtighten, as this could damage the board or toolhead.
Step 3: Connect the Wires
- Refer to the board’s manual for specific pin configurations.
- Flash EBB36 1.2, update config, pins as necessary.
- Ensure each connection is tight and correct to avoid malfunctions.
Common Mistakes to Avoid
- Rushing through the process.
- Not checking compatibility of the board with the toolhead.
- Not securing the board firmly.
By following these steps, you’ll be able to mount a board onto a toolhead and connect it properly, setting the stage for smooth machine operation.
Flashing EBB36 1.2 and Updating Configurations
Why Flash EBB36 1.2?
Flashing updates the board’s software, fixing bugs and adding features. It’s like upgrading your phone’s software.
Step-by-Step Flashing Guide
- Download the Firmware: Get the latest EBB36 1.2 firmware.
- Connect the Board: Use a USB cable to connect the board to your computer.
- Run the Flashing Tool: Follow on-screen instructions.
- Verify the Flash: Check for a confirmation message.
Updating Configurations and Managing Pins
- Access configuration files.
- Update settings like pin numbers, motor speeds, etc.
- Save and test to ensure everything works.
Deleting Current SB2209 Config and Simplifying the Process
Sometimes, it’s important to delete the current SB2209 config to prevent conflicts with new setups.
Steps to Safely Delete the Configuration
- Backup Important Files: Save current configurations.
- Access the Configuration Directory: Find where the SB2209 files are stored.
- Delete the Files: Carefully remove the correct files.
- Restart the System: Ensure changes take effect.
Going the Simplest Way Possible
- Simplify Connections: Use clear labels and direct connections.
- Test Each Step: Confirm everything works correctly.
Troubleshooting and FAQs
Common Issues and Solutions
- Toolhead Movement Issues: Check connections and pin configurations.
- Error Messages After Flashing: Revisit configuration files for errors.
- Board Recognition Problems: Try a different USB cable or port.
Frequently Asked Questions
- When to Delete Current SB2209 Config: If there are conflicts with new setups.
- How to Disconnect the Whole Toolhead: Power down first, label connections.
- Simplifying Setup: Use only necessary components, clearly label parts.
Final Tips
- Keep a Log: Document changes to configurations or hardware.
- Stay Updated: Check for firmware updates regularly.
- Ask for Help: Reach out to online communities for advice.
By addressing these common issues, you can ensure a smoother experience as you mount a board onto a toolhead and connect it properly. Remember, troubleshooting is a normal part of the process, and with the right approach, you’ll be back to creating in no time!
Call to Action
We’d love to hear from you! Share your experiences or ask questions in the comments, or join our community forums to connect with fellow enthusiasts. Happy making!